Why Patagonia Packing Is Different
If you are searching for a Patagonia packing list, you are already doing the smartest thing you can do for this region: planning for fast-changing conditions. Patagonia sits at the southern end of South America, where open plains, glaciers, and rugged mountains create their own microclimates. It is common to feel sunshine, wind, and cold drizzle in a single afternoon—sometimes on the same trail.
The goal of this guide is simple: help you pack light, stay dry, and stay warm without overpacking “just in case.” You will learn what to bring for day hikes, multi-day treks, and road trips through both Chilean and Argentine Patagonia, plus how to adapt your kit by season and by activity.

Throughout the article, think in systems rather than single items. In Patagonia, a good layering strategy plus a few protective essentials can handle almost anything the sky throws at you.
Quick Weather Reality Check
Patagonia is famous for its powerful winds—especially in spring and summer—plus sudden rain and chilly nights, even when daytime temperatures feel mild. Mountain areas like Torres del Paine, El Chaltén, and the Fitz Roy range can shift from calm to gusty very quickly. At higher elevations, wind chill can make “comfortable” temperatures feel much colder.
That is why most experienced hikers build their packing around three pillars: wind protection, rain protection, and layering for warmth. If you get those right, the rest becomes much easier.
Patagonia Packing List at a Glance
Use this overview as your checklist, then read the detailed sections to fine-tune based on your itinerary and comfort level.
- Layering clothing (base, mid, insulation, shell)
- Windproof/waterproof outerwear
- Trail-ready footwear (plus blister care)
- Accessories for the sun, cold, and gusts
- Daypack essentials for safety and comfort
- Optional trekking/camping gear if you are self-supported
- Travel documents, power, and practical extras
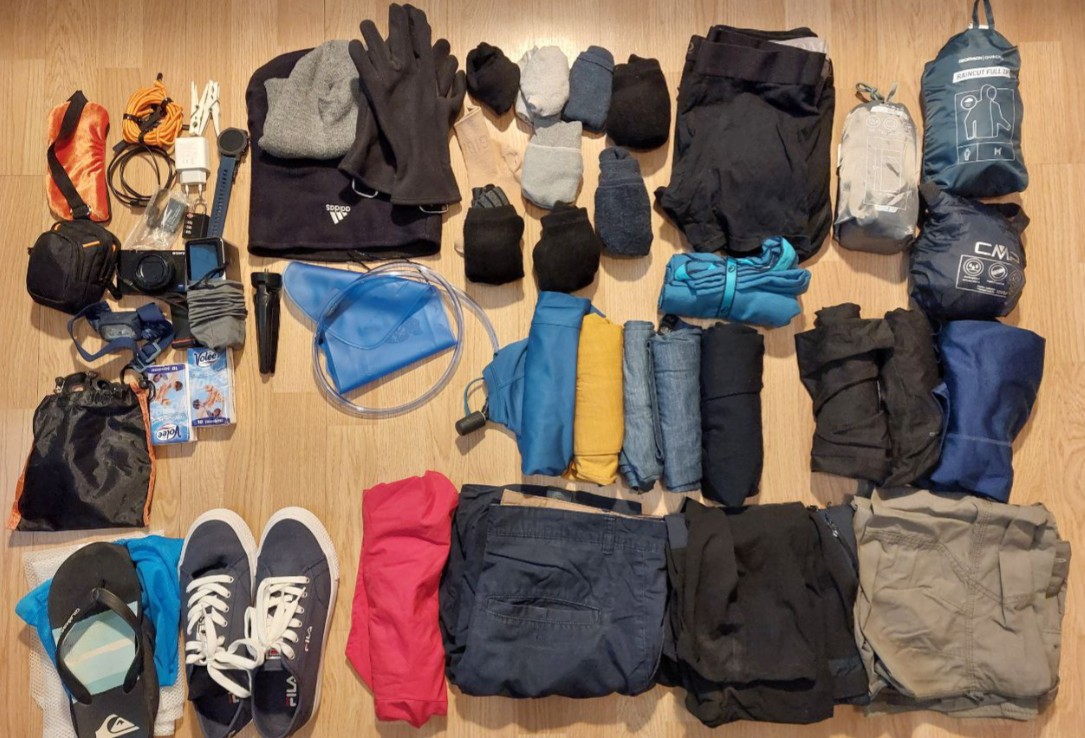
Clothing: Build a Layering System
The best Patagonia packing list starts with layers, not outfits. You want pieces that mix easily, dry quickly, and work across a range of temperatures. A reliable system also lets you adjust without stopping for long—important when strong winds make breaks feel colder.
1) Base Layers (Next-to-Skin)
Pack 2–3 moisture-wicking tops and 1–2 bottoms, depending on trip length. Synthetic or merino fabrics are popular because they dry faster than cotton and help manage sweat. Cotton can feel clammy in cool weather, so many travelers avoid it for hiking days.
- 2–3 long-sleeve wicking tops (one can be lighter)
- 1–2 wicking bottoms/leggings (optional for summer, useful for shoulder seasons)
- 3–5 pairs of hiking socks (merino or synthetic)
- Breathable underwear that dries quickly
2) Mid Layers (Warmth While Moving)
Your mid-layer is what you wear most while hiking. A fleece or light synthetic jacket adds warmth without trapping too much sweat. Choose one that fits comfortably under a shell.
- 1 lightweight fleece or grid fleece
- 1 thin insulating layer (light puffy or synthetic jacket)
3) Insulation Layer (Warmth When You Stop)
Even if your days are active, evenings can be cold and windy—especially near lakes and open viewpoints. A warm jacket is one of the most-used items in Patagonia towns, lodges, and campsites.
- 1 warmer puffy jacket (down or synthetic)
- Optional: insulated vest for flexible warmth
4) Shell Layers (Wind and Rain Protection)
If you only “splurge” on one category, make it your shells. A waterproof rain jacket and rain pants can turn an uncomfortable day into a great one. More importantly, a good outer shell blocks wind, which is often the real culprit behind feeling cold.
- 1 waterproof breathable rain jacket with a hood
- 1 pair waterproof rain pants (full-zip sides are convenient)
- 1 wind-resistant softshell (optional, but great for dry, gusty days)
Footwear: Traction, Support, and Dry Feet
Footwear choices depend on your route. For popular trails around El Chaltén or Torres del Paine, you will likely encounter wet gravel, mud, and sometimes snow patches early or late in the season. Waterproof hiking boots or waterproof trail shoes can be helpful, but comfort and fit matter more than the label.
- Well-broken-in hiking boots or supportive trail shoes
- Camp shoes or lightweight sandals for evenings
- Optional: gaiters for mud, rain, or snow
- Blister kit: blister pads, tape, small scissors, and antiseptic wipes
Tip: Prioritize what you will actually wear. Many travelers bring extra shoes that stay in the bag the whole time. If you can keep it to “hike shoes + camp shoes,” you will save space and weight.
Accessories That Make a Big Difference
Patagonia’s weather can feel dramatic, but a few small accessories change the experience. These are high-impact, low-weight additions to any Patagonia packing list.
- Warm beanie or insulated hat
- Buff or neck gaiter (excellent for wind)
- Light gloves + optional warmer gloves for shoulder seasons
- Sun hat or cap (the sun can be intense even when it is cold)
- Polarized sunglasses
- High-SPF sunscreen and lip balm
Daypack Essentials for Hiking and Viewpoints
A comfortable daypack (20–30L for most people) is ideal for day hikes. If you are doing hut-to-hut trekking, you may carry a larger pack, but the essentials remain similar. Think: warmth, weather protection, water, calories, and a few safety tools.
- Daypack with rain cover or a waterproof liner
- Reusable water bottle or hydration bladder
- Trail snacks: nuts, bars, jerky, dried fruit
- Lunch you can eat in wind (wraps, sandwiches, energy-dense foods)
- Compact first-aid kit + personal medications
- Headlamp (useful even for early starts or late returns)
- Map/offline navigation (phone map + downloaded routes)
- Emergency layer: lightweight puffy or extra mid-layer
- Emergency rain protection (if your shell is not already in the pack)
In high wind, loose items can disappear quickly. Use zip pouches for smaller gear and secure hats and gloves when you take them off.
Optional Trekking & Camping Gear
Many travelers book refugios, hotels, or guided treks that include key equipment. If you are doing a fully self-supported trek, you will need to add camping gear. In Patagonia, durability matters because wind can stress tents and stakes. If you are renting gear locally, ask specifically about wind-rated tents and the condition of rainfly seams.
- Backpacking pack (40–65L depending on trip style)
- Wind-resistant tent (or confirm your rental is suitable)
- Sleeping bag rated for cold nights; consider a liner for versatility
- Sleeping pad (an insulated one is best for shoulder seasons)
- Stove, fuel, lighter/matches, and a simple cook kit
- Food storage bags + trash bags (pack out what you pack in)
Electronics and Camera Gear
Patagonia’s landscapes are hard to forget, and many people bring a camera. Wind and rain are the main hazards for electronics, so prioritize protection over extra gadgets.
- Phone + charging cable
- Power bank (helpful on long hiking days)
- Universal travel adapter (Chile and Argentina may differ by plug type)
- Camera (optional) + extra battery
- Dry bag or zip pouches for electronics
If you plan to photograph glaciers or peaks, consider a small microfiber cloth. It is surprisingly useful for wiping rain off lenses and sunglasses.
Toiletries and Personal Care
Keep toiletries compact. You can buy basics in larger towns, but remote areas may have limited selection. Remember that wind and sun together can dry your skin faster than expected.
- Travel-size toiletries (toothbrush, toothpaste, deodorant)
- Moisturizer (especially if you are outdoors daily)
- Hand sanitizer
- Quick-dry towel
- Any prescriptions + a copy of prescriptions if needed
Documents, Money, and Practical Travel Items
Patagonia often involves border crossings between Chile and Argentina. Keep documents organized and accessible, especially if you are moving between regions by bus or rental car.
- Passport + copies (paper or digital)
- Travel insurance details
- Reservations (lodges, refugios, campsites, tours)
- Credit card + some cash (small towns may have spotty card systems)
- Reusable shopping bag (handy for groceries and snacks)
Season-by-Season Packing Tips
No single checklist fits every month. Use these seasonal notes to adjust your Patagonia packing list without doubling your luggage.
Summer (December–February)
Summer is popular for trekking, but it still brings wind and sudden rain. Focus on breathable layers and reliable shells. Nights can be cool, so do not skip an insulation layer.
Shoulder Seasons (October–November, March–April)
These months can be fantastic: fewer crowds, dramatic skies, and crisp air. Expect colder mornings, more variable precipitation, and potentially snow at higher elevations. Add warmer gloves, an extra base layer, and consider gaiters.
Winter (May–September)
Winter travel in Patagonia can be magical, but conditions can be harsher and services more limited. If you are visiting in winter, research local accessibility and bring sturdier cold-weather gear. Many multi-day treks are not recommended without proper experience and guidance.
Comfort Upgrades That Are Worth It
Some items are not “mandatory,” but they can dramatically improve your trip—especially if you are sensitive to cold or you want to maximize time outdoors.
- Trekking poles (reduce fatigue on long descents and add stability in wind)
- Lightweight insulated mug for hot drinks on chilly mornings
- Earplugs (useful in windy lodges or shared rooms)
- Small repair kit: safety pins, duct tape wrap, spare buckle
Pack Light: A Simple Strategy That Works
Overpacking is easy when the weather feels unpredictable. Instead of bringing more clothes, bring clothes that layer well. Here is a practical rule: if two items do the same job, pick the lighter, faster-drying option.
Plan laundry into your itinerary if you are traveling for more than a week. Many towns have laundromats or accommodations that offer laundry service. Even hand-washing socks and base layers can reduce how much you need to carry.
Patagonia Basics, Explained
Before you finalize your bag, it helps to understand the geography. Patagonia spans both Chile and Argentina, and many iconic hikes sit near the Andes. That mix of ocean influence, mountains, and open steppe is a recipe for powerful winds and quick weather shifts.
In other words, the environment is not “bad,” it is just dynamic. Once you respect it—and pack for it—you can enjoy those big skies and dramatic landscapes with confidence.
Sample Packing Checklist (Copy/Paste)
Use this as a final review the night before you travel.
- Clothing: 2–3 base tops, 1–2 base bottoms, fleece, warm puffy, waterproof shell jacket, rain pants, hiking pants/shorts, sleepwear
- Footwear: hiking boots/shoes, hiking socks, camp shoes, blister kit
- Accessories: beanie, buff, gloves, sun hat, sunglasses, sunscreen, lip balm
- Daypack: water, snacks, lunch, headlamp, first aid, map/offline GPS, extra layer, rain cover
- Travel: passport, insurance, cards/cash, reservations, reusable bag
- Tech: phone, charger, power bank, adapter, dry bag
Mistakes to Avoid
A few common packing mistakes can make Patagonia feel harder than it needs to be:
- Skipping rain pants: A jacket helps, but wind-driven rain can soak legs quickly.
- Bringing brand-new boots: Blisters ruin itineraries faster than bad weather.
- Forgetting sun protection: Cool air can hide how strong the UV feels.
- Relying on “one warm hoodie”: Layering works better and dries faster.
Where to Buy or Rent Gear in Patagonia
If you prefer to travel lighter, consider buying or renting in gateway towns. Puerto Natales (Chile) and El Calafate or El Chaltén (Argentina) often have rental shops for trekking poles, sleeping bags, and sometimes tents. Availability changes by season, so reserve ahead for peak months. If you are on a tight schedule, pack the essentials (shells, base layers, footwear) and rent bulky items locally.
How to Pack Your Bag So Gear Stays Dry
Smart organization matters as much as smart gear. In Patagonia, you often start a hike in calm conditions and finish in sideways drizzle. If your warm layers and electronics get damp inside your pack, the rest of the day can feel much colder. A simple packing routine prevents that.
Start by lining your backpack with a waterproof pack liner or a large trash compactor bag. This creates a dry “core” for anything you cannot afford to soak—your puffy jacket, spare base layer, and sleep clothes if you are trekking. Keep your rain jacket and rain pants outside the liner (or in an external pocket) so you can reach them quickly when clouds move in.
Next, use two or three lightweight pouches: one for first aid and blister care, one for snacks, and one for electronics. This makes it easier to grab what you need in strong wind without emptying your entire bag. If you carry a camera, a small dry bag inside the pack adds an extra layer of protection during heavy rain.
Finally, think about “on-trail access.” Your hat, gloves, buff, and sunglasses should live near the top of your pack or in hip-belt pockets. These are the items you will swap on and off all day. When you follow this system, your Patagonia packing list becomes more than a checklist—it becomes a setup that keeps you comfortable even when the weather changes mid-route.
Final Thoughts
A good Patagonia packing list is not about carrying everything—it is about carrying the right system. When you have dependable wind and rain protection, a warm insulation layer, and comfortable footwear, you can focus on the real reason you came: huge views, quiet trails, and the kind of weather that makes every photo look cinematic.
You Might Also Like: Best Time to Visit Patagonia for Hiking and Wildlife
Whatever route you choose—day hikes, multi-day treks, or a scenic road trip—use this Patagonia packing list as your baseline, then adjust for your season and comfort. Pack smart, keep layers accessible, and Patagonia’s wind, rain, and mountain weather will feel like part of the adventure rather than a surprise.