If you’ve got one week and you want a trip that feels bigger than the calendar, this plan is for you. This Ecuador itinerary 7 days long, blends three very different moods: colonial Quito’s cafés and viewpoints, the high-altitude drama of the Andes (volcanoes, crater lakes, market towns), and a “taste” of the islands without committing your whole vacation to a full cruise.
Ecuador looks small on a map, but the geography is intense. In a single week, you can go from 2,850 meters (9,350 ft) in Quito to windswept páramo near snow-capped peaks, then down toward warmer valleys and (optionally) out into the Pacific for wildlife. The secret to making it fun—not frantic—is to respect altitude, pack layers, and plan transport like puzzle pieces. I’ll walk you through a realistic, day-by-day route with smart booking tips and easy swaps.
The itinerary assumes you’re flying in and out of Quito, which is the most common setup for international travelers. If your flights differ, you can still use the same building blocks—just reorder the days.
Quick Snapshot: What You’ll Cover
- Days 1–2: Quito (historic center, viewpoints, local food) + a highlands market day trip
- Day 3: Cotopaxi area for volcano landscapes and short hikes
- Day 4: Quilotoa crater lake and classic “Avenue of the Volcanoes” scenery
- Day 5: Baños for waterfalls, swings, and hot springs
- Days 6–7: A compact Galápagos add-on (Santa Cruz base) for wildlife and one iconic day tour
Before You Go: Small Things That Make a Big Difference
Altitude strategy (the make-or-break detail)
Quito is high, and several day trips go even higher. Plan gentle walks on Day 1, drink plenty of water, and avoid stacking strenuous activities back-to-back. If you’re altitude-sensitive, don’t force a “hero hike” your first morning—your lungs will thank you later in the week.
Dress in layers
Andean weather changes fast: bright sun, wind, and chilly drizzle can happen in the same hour. Pack a light rain shell, a warm mid-layer, and sunscreen. Comfortable sneakers or light hikers are enough for most short trails on this route.
Money and basics
Ecuador uses the US dollar, which makes budgeting straightforward. Cards work widely in Quito, but markets and small towns still prefer cash. Download offline maps, and keep a small daypack for water, snacks, and a rain jacket.
How to Use This Itinerary Without Burning Out
This route is built around a few “bases” instead of changing hotels every night. You’ll sleep in Quito for the first three nights, shift south for the Quilotoa corridor, spend a night in Baños, and finish in the Galápagos. If you hate repacking, you can keep Quito as your base and swap in day trips, but you’ll spend more hours in transit.
One more mindset shift: Ecuador’s mountain roads are gorgeous, but they’re not fast. When in doubt, book morning departures for longer days and keep your afternoons low-stress.
Day 1: Arrive in Quito and Ease Into the Altitude

Land, drop your bags, and keep your first day simple. Start with an easy walk through the historic center—plazas, grand facades, small bakeries, and the rhythm of local life. The goal is orientation, not a checklist marathon. Choose one “anchor” experience: a museum that fits your interests, a church interior, or a food-focused stroll that helps you learn the flavors of Ecuador.
For your first panoramic view, aim for late afternoon when the light softens, and the city feels calmer. Then pick a relaxed dinner: try a hearty soup, grilled meats or vegetables, and a fresh fruit juice. Finish early. Sleep is the most underrated altitude tool.
Where to stay tonight: Central Quito for walkability, or the modern north for bigger hotels and easier transfers. If you like cafés and a creative vibe, look for options near La Floresta.
Day 2: Quito Highlights + A Market-and-Lake Highlands Day Trip
Spend your morning finishing the Quito highlights you skipped on Day 1: a neighborhood coffee crawl, a museum, or a viewpoint you’ve been saving. Keep lunch light and leave a window for the afternoon—this is a great day to experience the highlands outside the city without feeling rushed.
Head north for a market-and-lake style day trip. Many travelers choose the Otavalo region for its craft market energy, nearby villages, and photogenic landscapes. If markets aren’t your thing, swap this for a cloud-forest half-day (a totally different climate and a fun contrast to the Andes) and still return to Quito by evening.
At the market, focus on quality over quantity. Pick one or two handmade items you genuinely want, ask questions, and budget time for snacks—fresh fruit, roasted corn, or a warm drink when the wind picks up. Back in Quito, keep dinner close to your hotel and get another solid night of sleep.
Booking tip: if you’re not renting a car, a small-group tour is the simplest way to combine multiple stops without navigating bus connections.
Day 3: Cotopaxi Views Without “Summit” Pressure

Today is about wide-open scenery: páramo grasslands, huge skies, and the chance to see one of Ecuador’s most famous volcano landscapes up close. Start early and aim for the Cotopaxi area. The beauty of this day is that it doesn’t need to be extreme. You can choose a gentle hike to a viewpoint, a short loop trail, or a visit to a lagoon where reflections look unreal when the weather cooperates.
If you feel strong and conditions are good, some routes include a higher-elevation walk near a refuge area. But don’t treat it like a competition. Move slowly, take breaks, and dress for wind. Bring snacks and a warm layer—sun at altitude is intense even when the air feels cold.
In the afternoon, shift into recovery mode. A cozy late lunch, a warm drink, and a calm return to Quito make this day feel like an adventure rather than an endurance test. If you prefer fewer back-and-forth drives, overnight in Latacunga to set up Day 4.
Optional add-on: guided horseback riding on the páramo or a bike descent route for a bit more adrenaline (best with a guide for safety).
Day 4: Quilotoa Crater Lake and the “Avenue of the Volcanoes”
Quilotoa is one of those places that makes you pause mid-sentence. The crater-rim view is the headline, but the “how” matters. Go early to chase clearer skies. From the rim, walk a section of the loop trail for different angles; it’s breezy and exposed, so layers and sunscreen are essential.
Walking down to the water is tempting, and it’s stunning—but remember you must climb back up. If you’re short on time, or you’re still adjusting to altitude, keep it to rim walks and viewpoints instead. You’ll still get the full wow factor without turning the day into a slog.
After Quilotoa, you’ll travel south through classic highlands scenery often nicknamed the Avenue of the Volcanoes. Overnighting in a smaller town (Latacunga or somewhere along the route) breaks up the drive and gives you a quieter evening. Try a simple local dinner, charge everything, and sleep early—tomorrow shifts you toward warmer valleys.
Day 5: Baños for Waterfalls, Swings, and Hot Springs
Baños de Agua Santa is the reset button in this week. The altitude is lower, the air feels softer, and the town is built for easy fun. Your day can be as active or as relaxed as you want. Many travelers rent bikes or take a short tour along the waterfalls route, stopping at viewpoints and snack stands along the way.
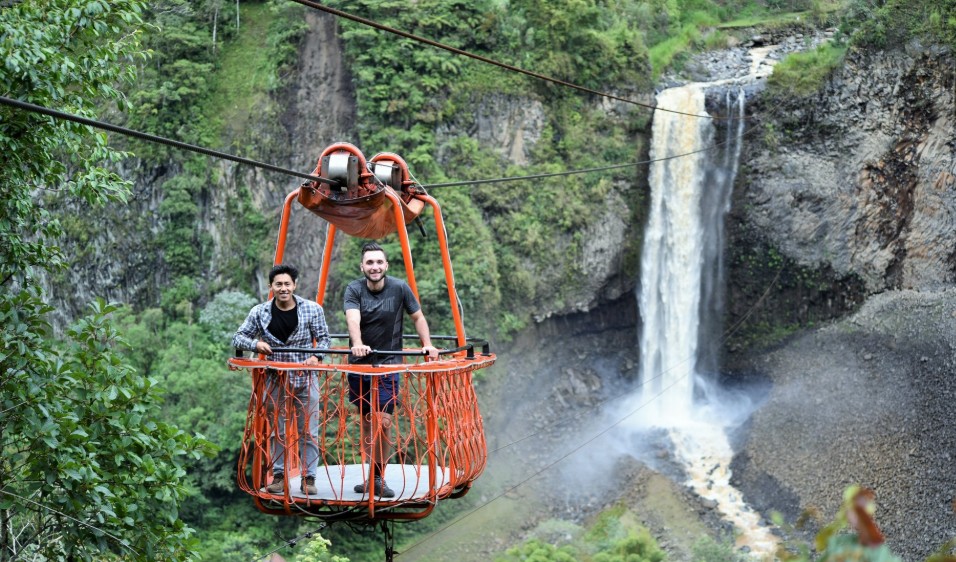
If you love dramatic viewpoints, you’ll find plenty—some with famous swings over the valley. If you prefer a slower pace, choose one waterfall walk and save energy for the evening. The perfect end to the day is a soak in thermal baths. Your legs will thank you after two big highlands days.
Sweet stop: Baños is known for melcocha (pulled sugar candy). Watching it being made is oddly mesmerizing, and tasting it fresh is part of the town’s charm.
Day 6: Fly to the Galápagos for a Compact Island Base
To make a “taste of the Galápagos” work inside one week, keep it simple: fly from the mainland and choose one base. Santa Cruz is a popular choice because it’s well-connected for day tours, easy to navigate, and gives you wildlife moments without complicated logistics.
Once you arrive in the Galápagos Islands, your main job is to slow down and follow the rules that protect the ecosystem. Plan a gentle first afternoon: a waterfront walk, a seafood dinner, and an easy sunset viewpoint. You may already spot sea lions lounging on benches, which feels surreal the first time you see it.
Practical note: even a short add-on includes fixed park-related fees and regulations, and popular day tours can sell out in busier periods. If you’re traveling during peak dates, book the next day’s tour ahead.
Day 7: One Iconic Day Tour + Return Logistics
Your final full day is for the Galápagos experience you’re most excited about. Depending on season and availability, you’ll usually choose between a snorkeling-forward day, a nearby uninhabited island excursion, or a boat-based wildlife trip. In one well-planned day, it’s common to see marine iguanas, sea turtles, colorful fish, and dramatic volcanic coastlines.
Keep expectations realistic: a single day won’t “do” the whole archipelago, but it can absolutely be a highlight—especially if you pick a tour that matches your comfort level in the water. If you’re not a confident swimmer, look for calmer bays and more time on land.
Plan your return carefully. Many flights leave in the morning or early afternoon, and you’ll want buffer time for transfers and check-in. If your international flight is the same day, consider arriving back in Quito with enough cushion—or even the night before—to reduce stress.
Budget Tips for Ecuador Itinerary 7 Days
On the mainland, Ecuador can be very affordable if you use local transport, eat set lunches (often called almuerzos), and book simple hotels. For this Ecuador itinerary 7 days route, most travelers spend the least in Quito and the highlands, then allocate extra to the islands. The Galápagos is the exception: flights, fees, and boat tours raise the daily average. A smart approach is to save in the Andes and spend on one great island day.
- Likely splurges: Cotopaxi day tours, Quilotoa transport logistics, Galápagos boat tours
- Easy savings: set lunches, free viewpoints, walking tours, public buses (if you’re comfortable with slower travel)
Packing Checklist for Ecuador Itinerary 7 Days
Bring layers: a rain jacket, warm mid-layer, and breathable shirts. Add a sun hat, sunglasses, and high-SPF sunscreen. Pack a reusable water bottle and snacks that feel good at altitude (nuts, crackers, fruit). For Galápagos days, include reef-safe sunscreen if possible, a quick-dry towel, and a light windbreaker for boat rides.
If you’re packing one pair of shoes, choose something you can walk in all day that also grips on dusty paths. If you can pack two, add sandals for Baños and the islands.
Small Tweaks That Make the Week Feel Smoother
- Start early on Days 3 and 4—highlands weather is often clearest in the morning.
- Keep a daily “flex pocket” for cafés, rest, or a surprise museum.
- Eat lighter before high-altitude walks and save heavier meals for evenings.
- Leave room for serendipity: a street musician, a market snack, a viewpoint you didn’t plan.
Fast Customizations: Pick Your Style
Comfort-first: Use private transfers or small-group tours for Days 2–4, and choose hotels with better insulation/heating in the highlands.
Budget-first: Explore Quito on foot and by public transit, take buses for Otavalo and Baños, and keep the Galápagos to one paid day tour plus free town walks.
Adventure-first: Add biking in the Cotopaxi area, a longer rim walk at Quilotoa, and a snorkeling-heavy Galápagos day.
You Might Also Like: Galapagos on a Budget: DIY Itinerary Without Cruising
Strong travel is about rhythm, not just a checklist. With this Ecuador itinerary 7 days plan, you’ll get a real sense of the country’s contrasts—city culture, volcano country, and ocean wildlife—without turning every day into a race. Choose the highlights that fit your energy, be kind to your lungs at altitude, and you’ll leave Ecuador already plotting the return trip.